What Is Snugg?
(Insert What is Snugg)
Let’s start with creating an account:
Create an Account
Creating an account with Snugg is easy! To set up an account:
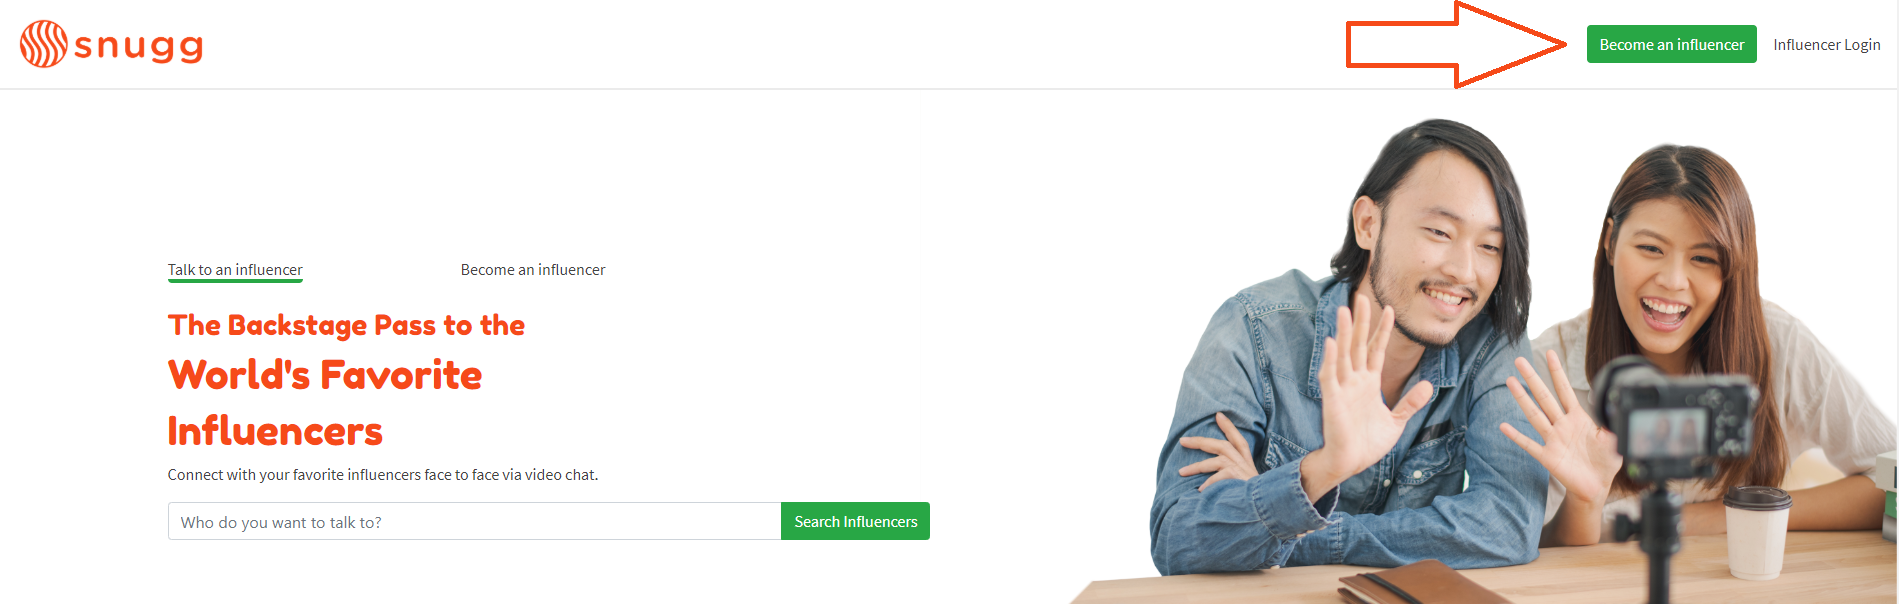
Goto Snugg
Click the “Become an Influencer” button at the top right.
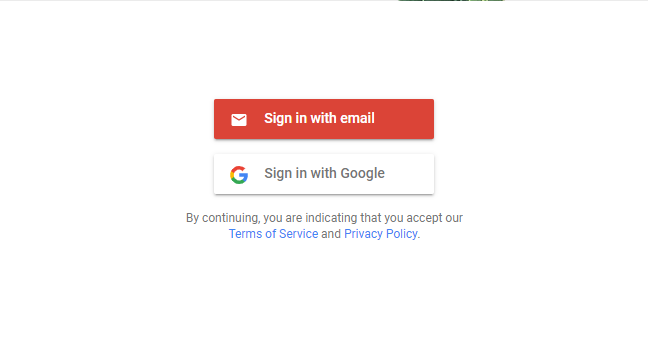
Here you have the option to create an account with a standard email address and password or sign in with an existing Google account.
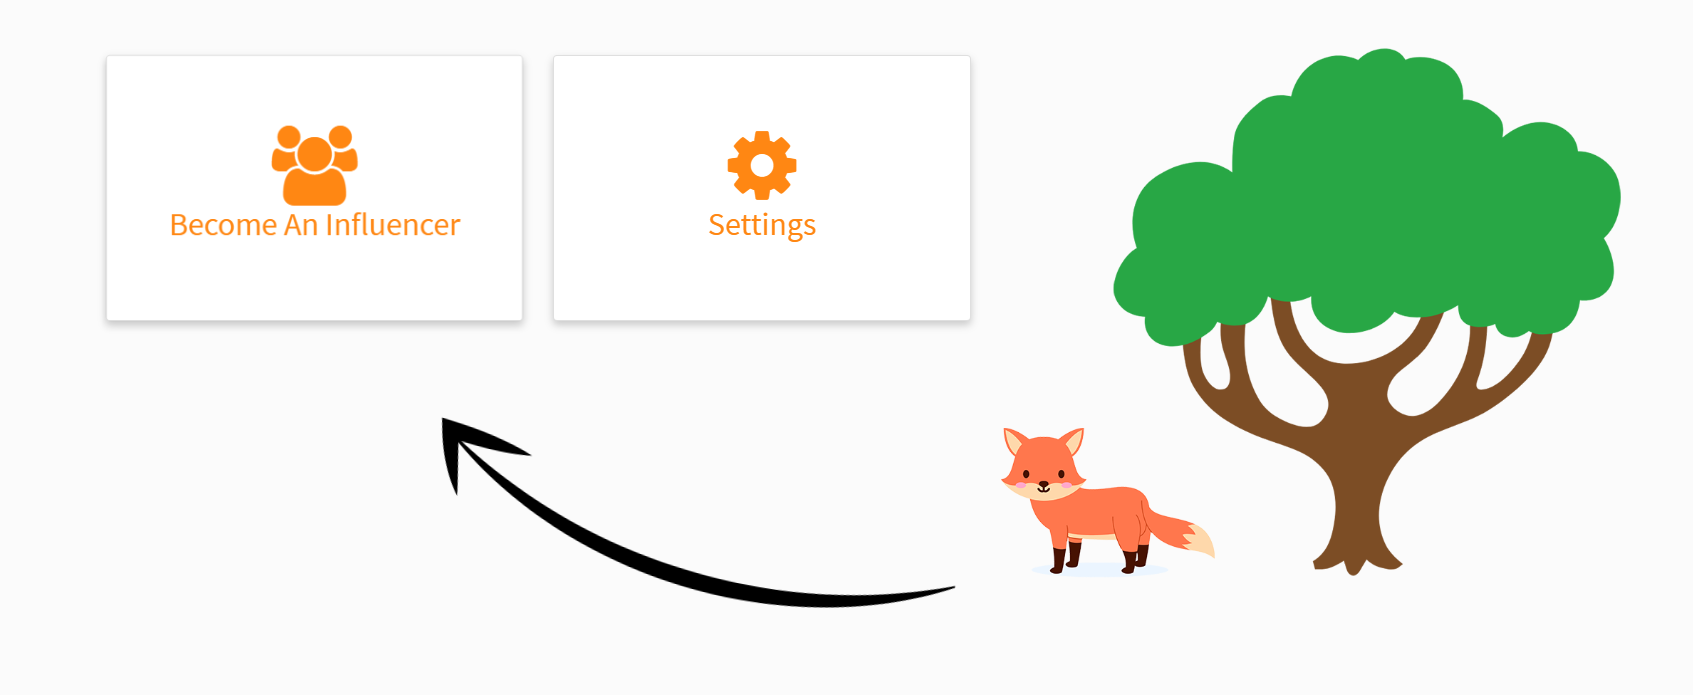
Once you’ve signed up, the next step is to get verified. Click the “become an influencer button”
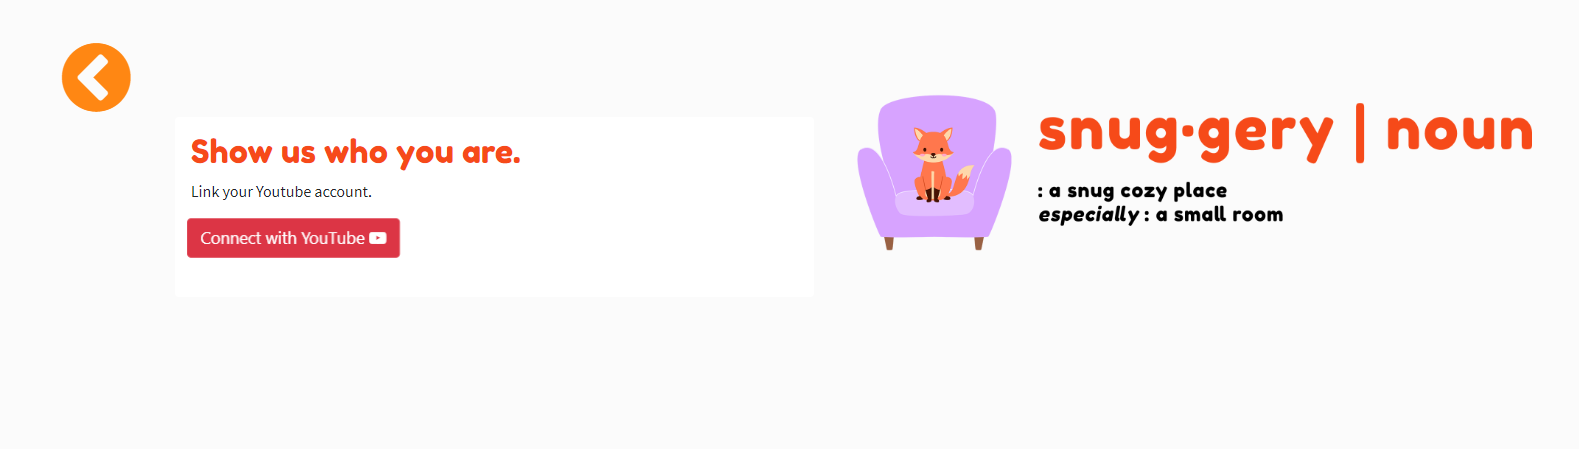
Now click “connect with YouTube.”
Enter your unique YouTube account email address. If you get a message saying “this app isn’t verified” click advanced at the bottom left and click “goto snugg.me”
Continue to approve and your application will be submitted. You will receive an email soon letting you know whether your account was approved or denied. Once approved, you’ll be able to log into your account and create your Snuggery.
What is A Snuggery?
Your Snuggery is your own little space that you can customize and share with your subscribers. Today you can customize the color, description, session types, availability blocks and name of your Snuggery but this is just the beginning. In the future your Snuggery will be the central place for all your social media that allows you to share your most authentic self from one location.
Setting Up Your Snuggery
After you’ve been approved, you’re ready to build your Snuggery. To setup your Snuggery for the first time follow these steps:
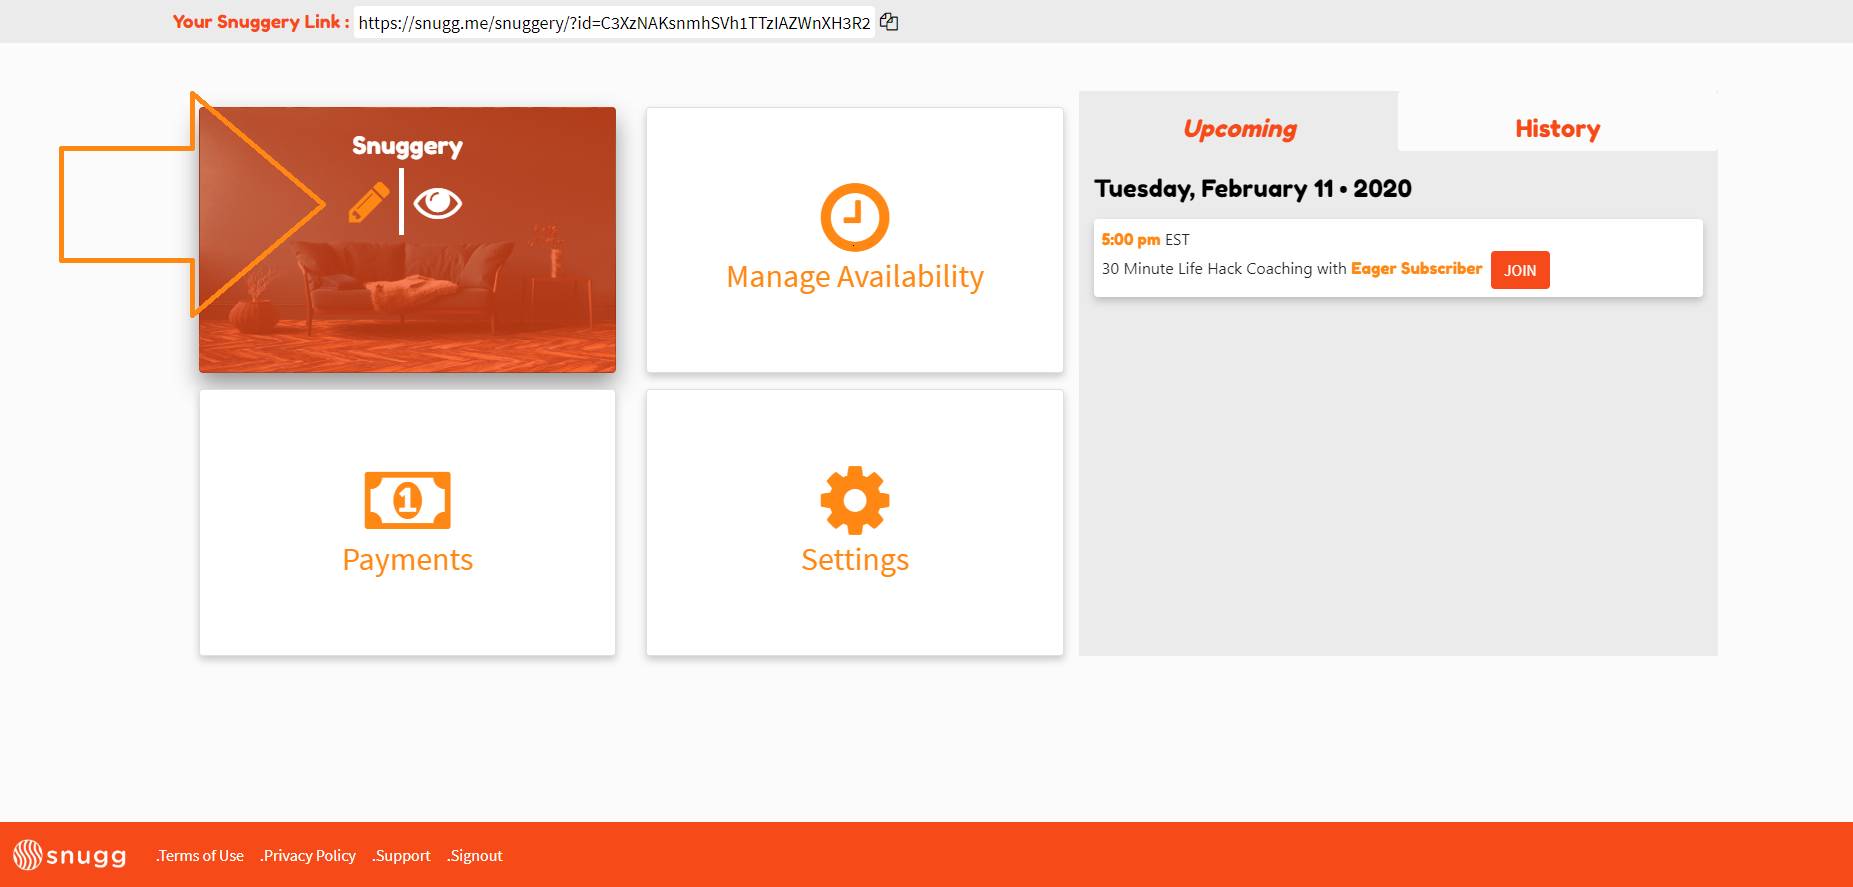
Login to Snugg
The page will automatically open to your Snuggery.
Select an image, enter your Snuggery’s name and a short description of what you offer. Keep in mind, this is the information your subscribers will see when they click your Snugg link.
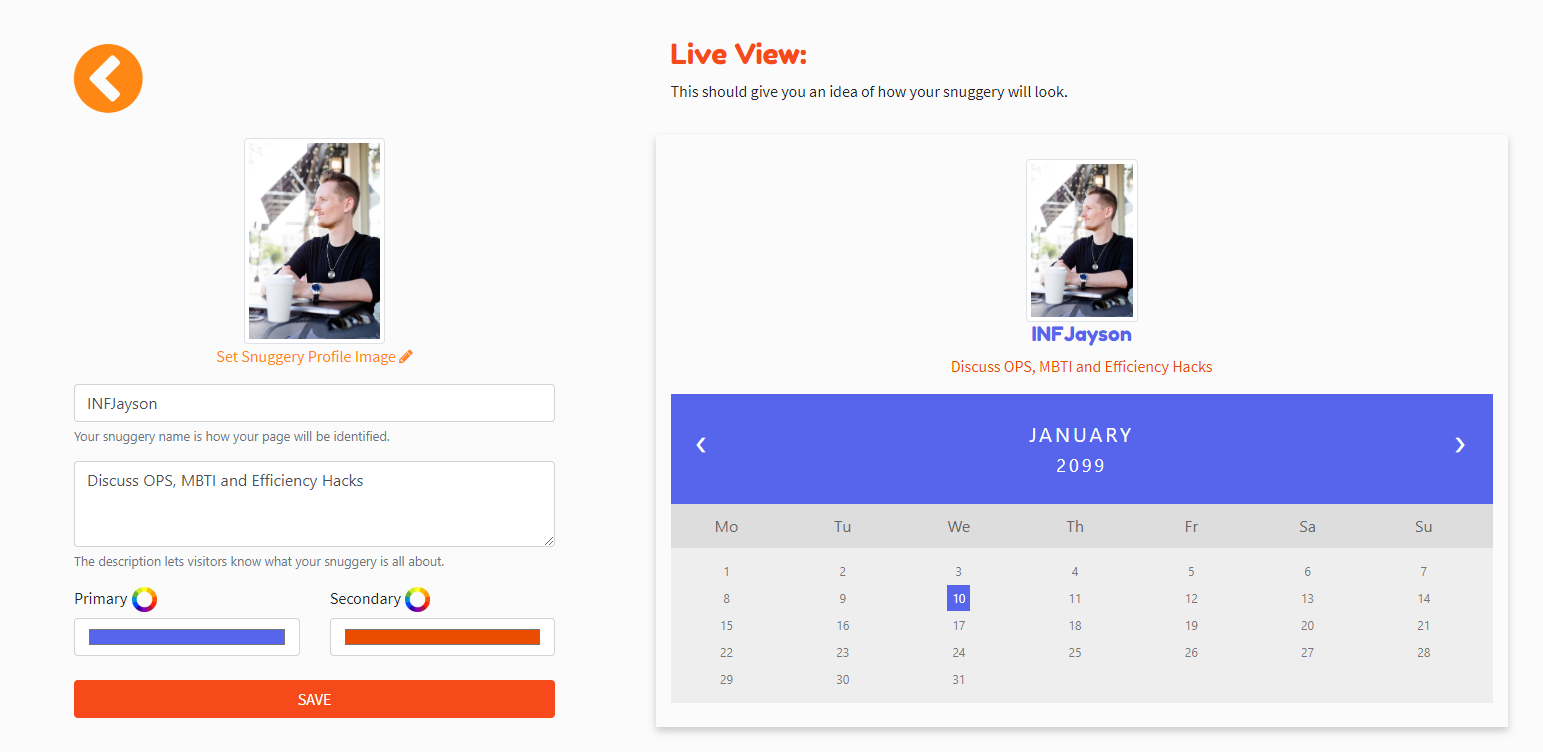
In addition, you can personalize your Snuggery by selecting primary and secondary colors.
Click Save.
If you’d like to go back and edit your Snuggery, log in to Snugg and from the Dashboard hover over “Snuggery” and click the pencil. You can also click the eye to view how your Snuggery looks to others when they click your Snugg link.
That’s it! Your Snuggery is setup! In the future we’ll be adding more customization to the Snuggery and would love to hear your thoughts. Click here to submit a feature request or move to the next step.
Linking Your Bank Account Through Stripe
After you’ve setup your Snuggery you’ll be asked to connect your bank account through Stripe. Stripe is a payment service that will allow anyone who clicks your Snugg link to pay with a credit or debit card. You won’t be able to go any further until you complete these steps:
Log into your account at Snugg.
Select your country, tax entity, phone number and email address.
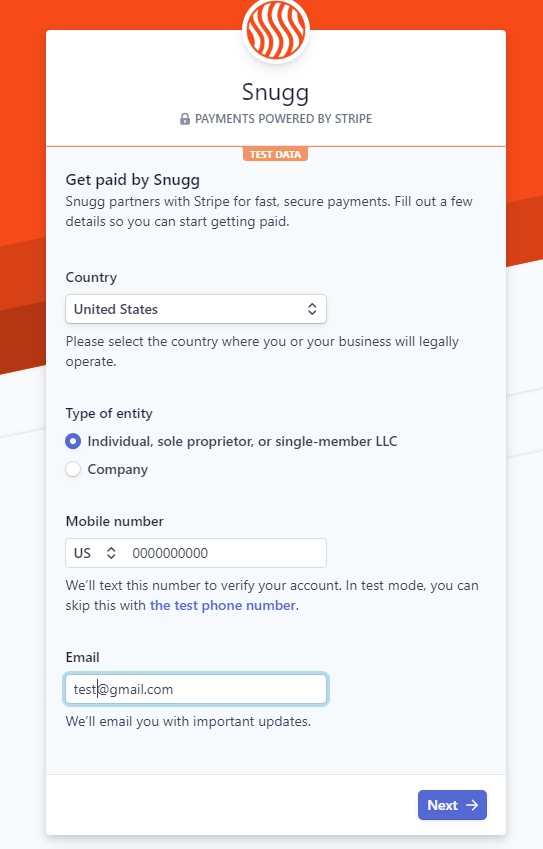
Verify your account by entering the text code.

Enter your legal name and email.
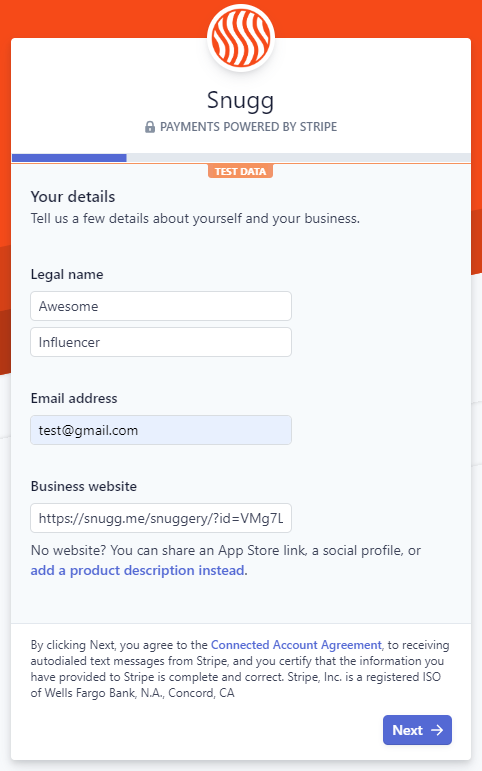
For your company we’ve already automatically put your unique Snuggery link in the field.
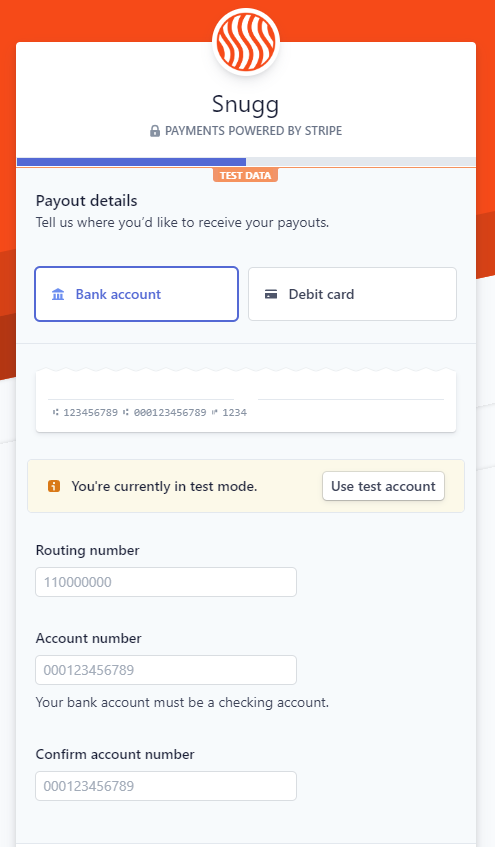
Enter your Bank Account number or Debit Card that you’d like funds to be dispersed to.
And that’s it! Your bank account is connected and you’re ready to move to the next step and create session types.
Create A Session Type
After you’ve created an account, have been approved by Snugg and created your Snuggery the next step is to create your Session Types.
Login to Snugg
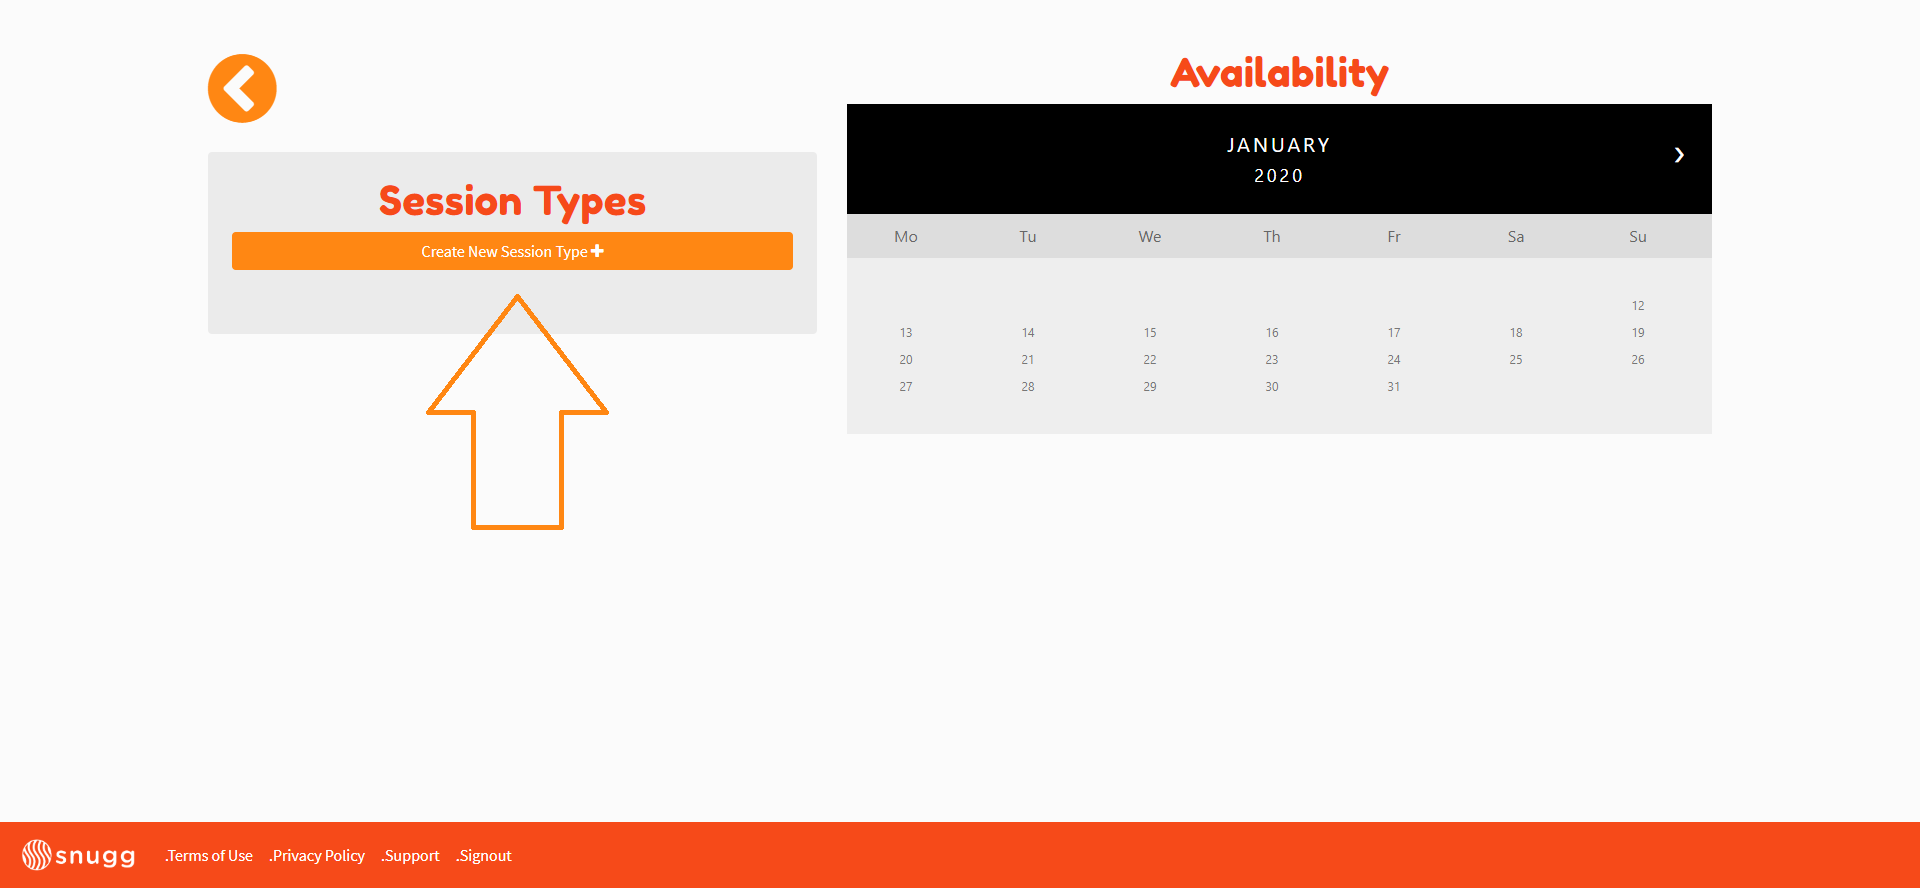
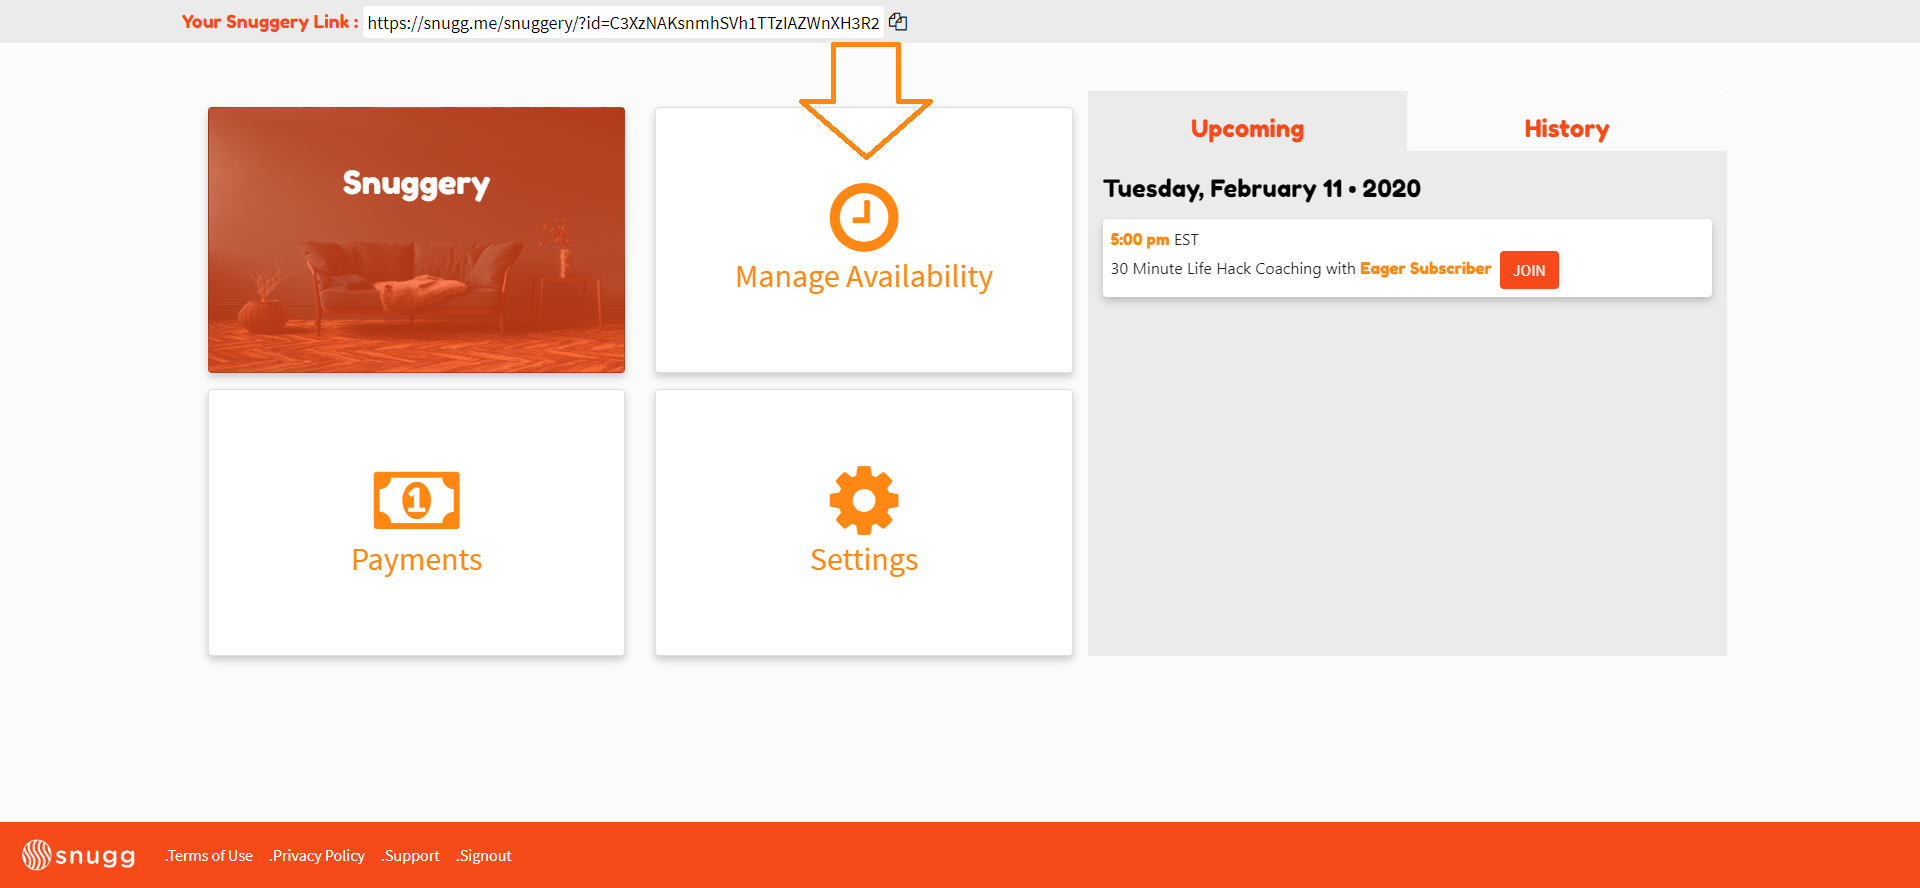
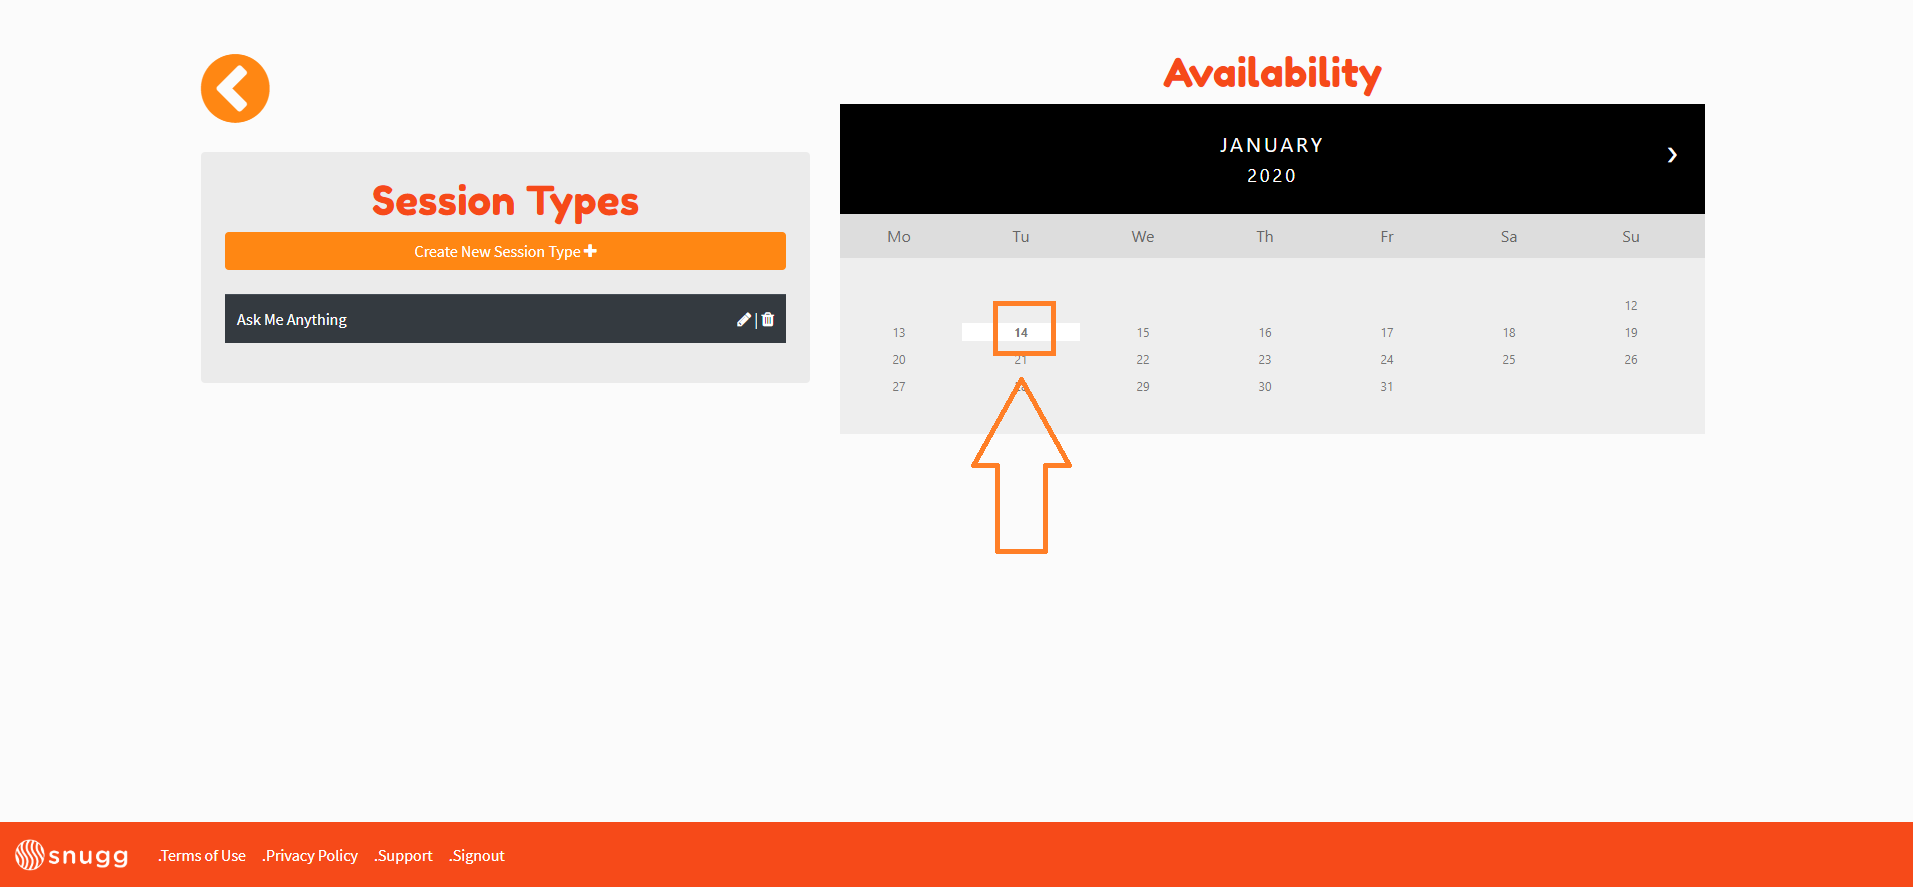
From the Dashboard, click Manage Availability.

Click “Create New Session Type.”
Name Your Session Type.
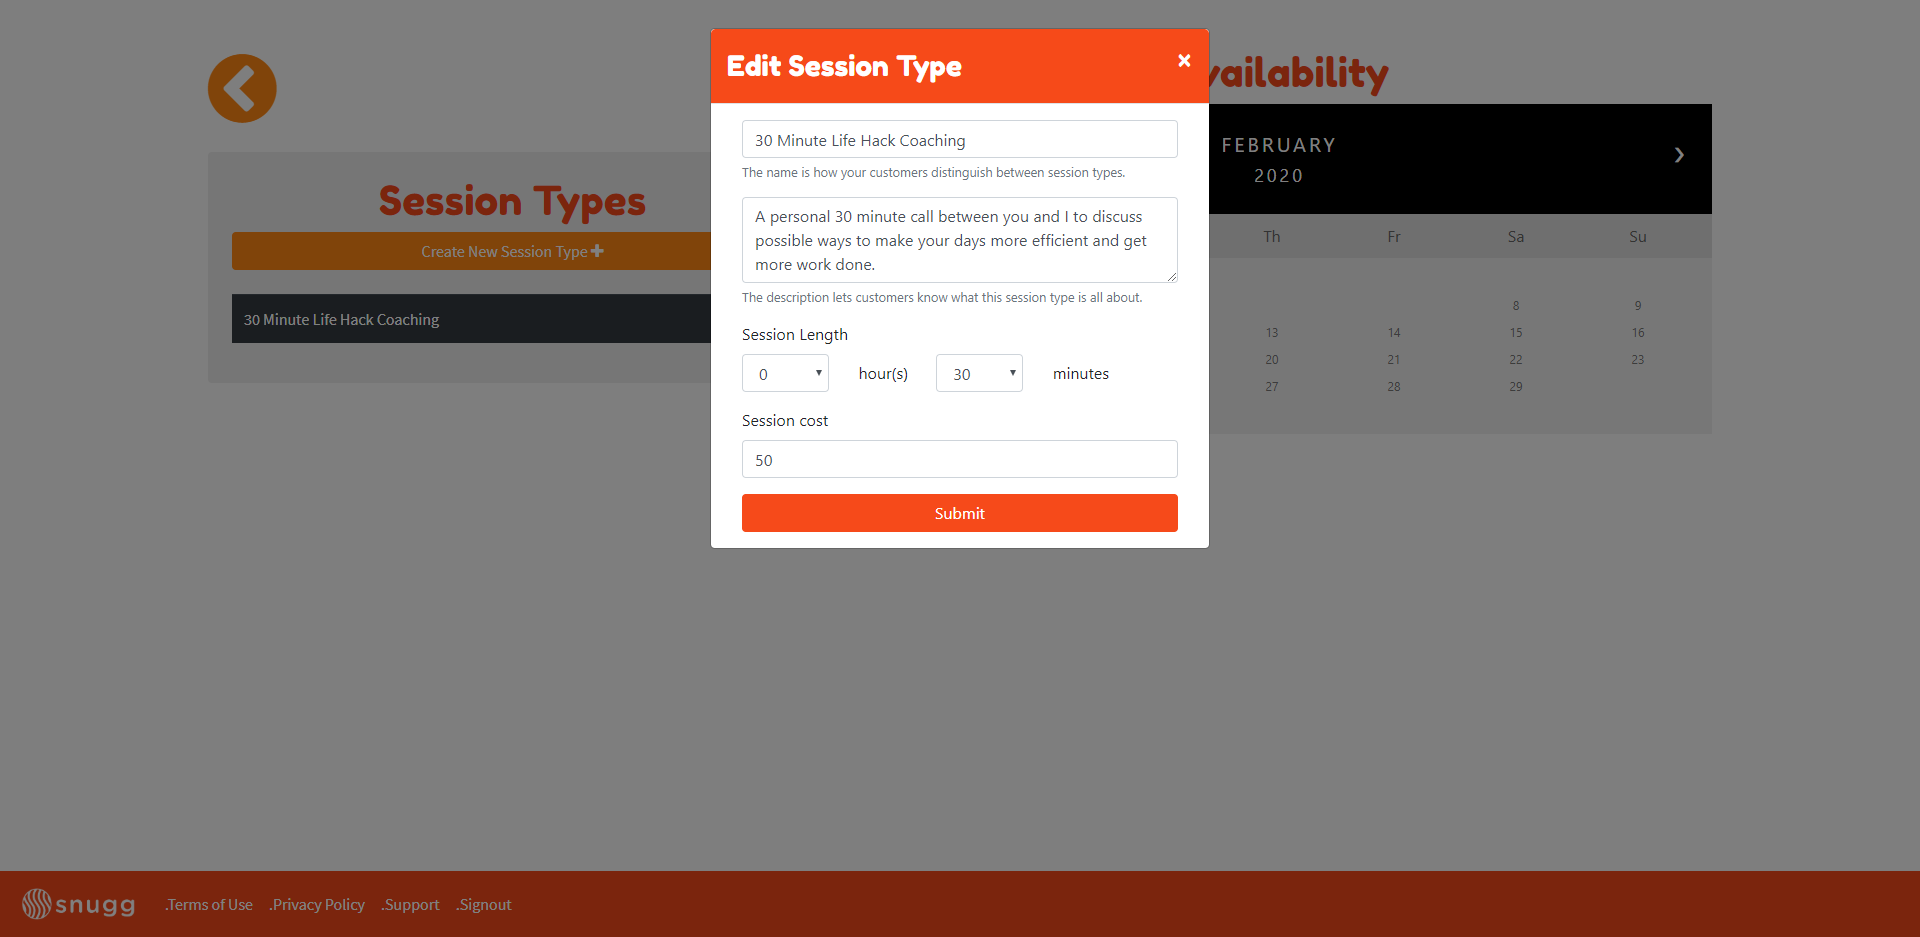
Add a description, how long the call will be and how much it will cost your subscriber.
Keep in mind, you can create as many session types as you’d like. For example, some people might want to talk to me about how I get so much work done every day.
Click submit
Repeat this process until you’ve listed as many session types as you want.
That’s it!
Next You’re going to want to create availability blocks in your schedule to allow subscribers to book time with you.
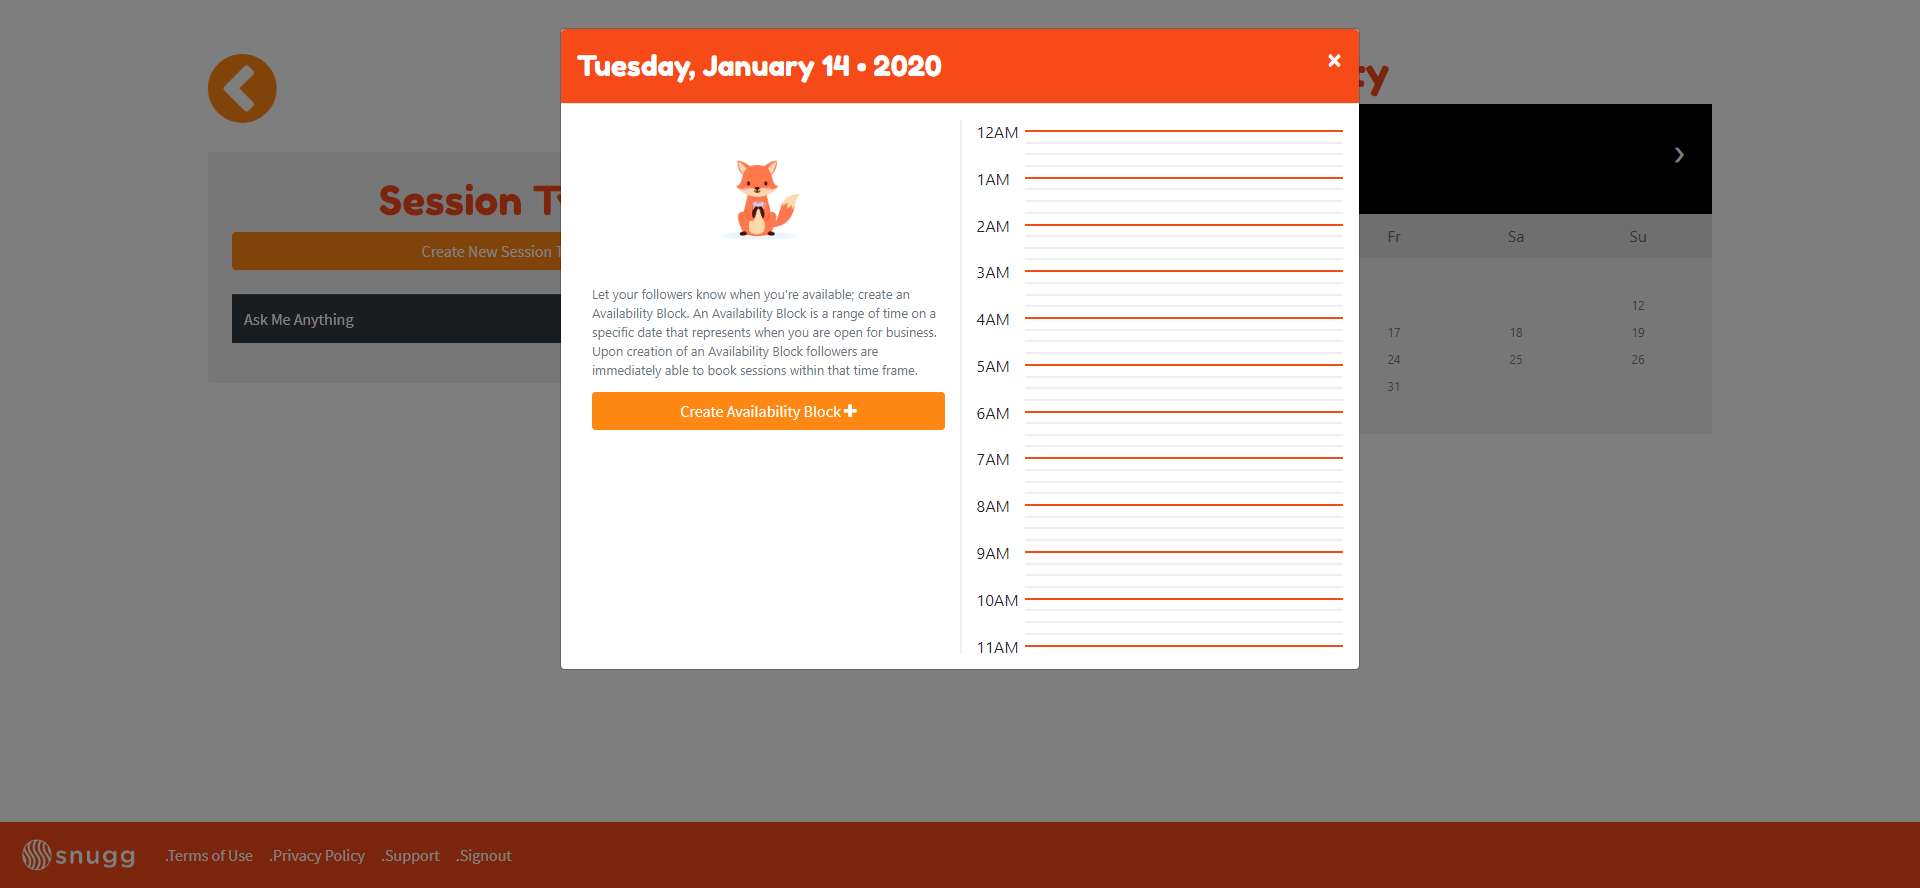
What is An Availability Block?
Availability blocks allow you to control your schedule by only letting subscribers book session types at times you set. You can use availability blocks to separate session types and block out times you’re willing to talk.
Creating Availability Blocks
After you’ve created an account, have been approved by Snugg, created your Snuggery and set up your Session Types the next step is to create your Availability Blocks. To create an availability block:
Login to Snugg.
From the Snugg Dashboard, click manage availability
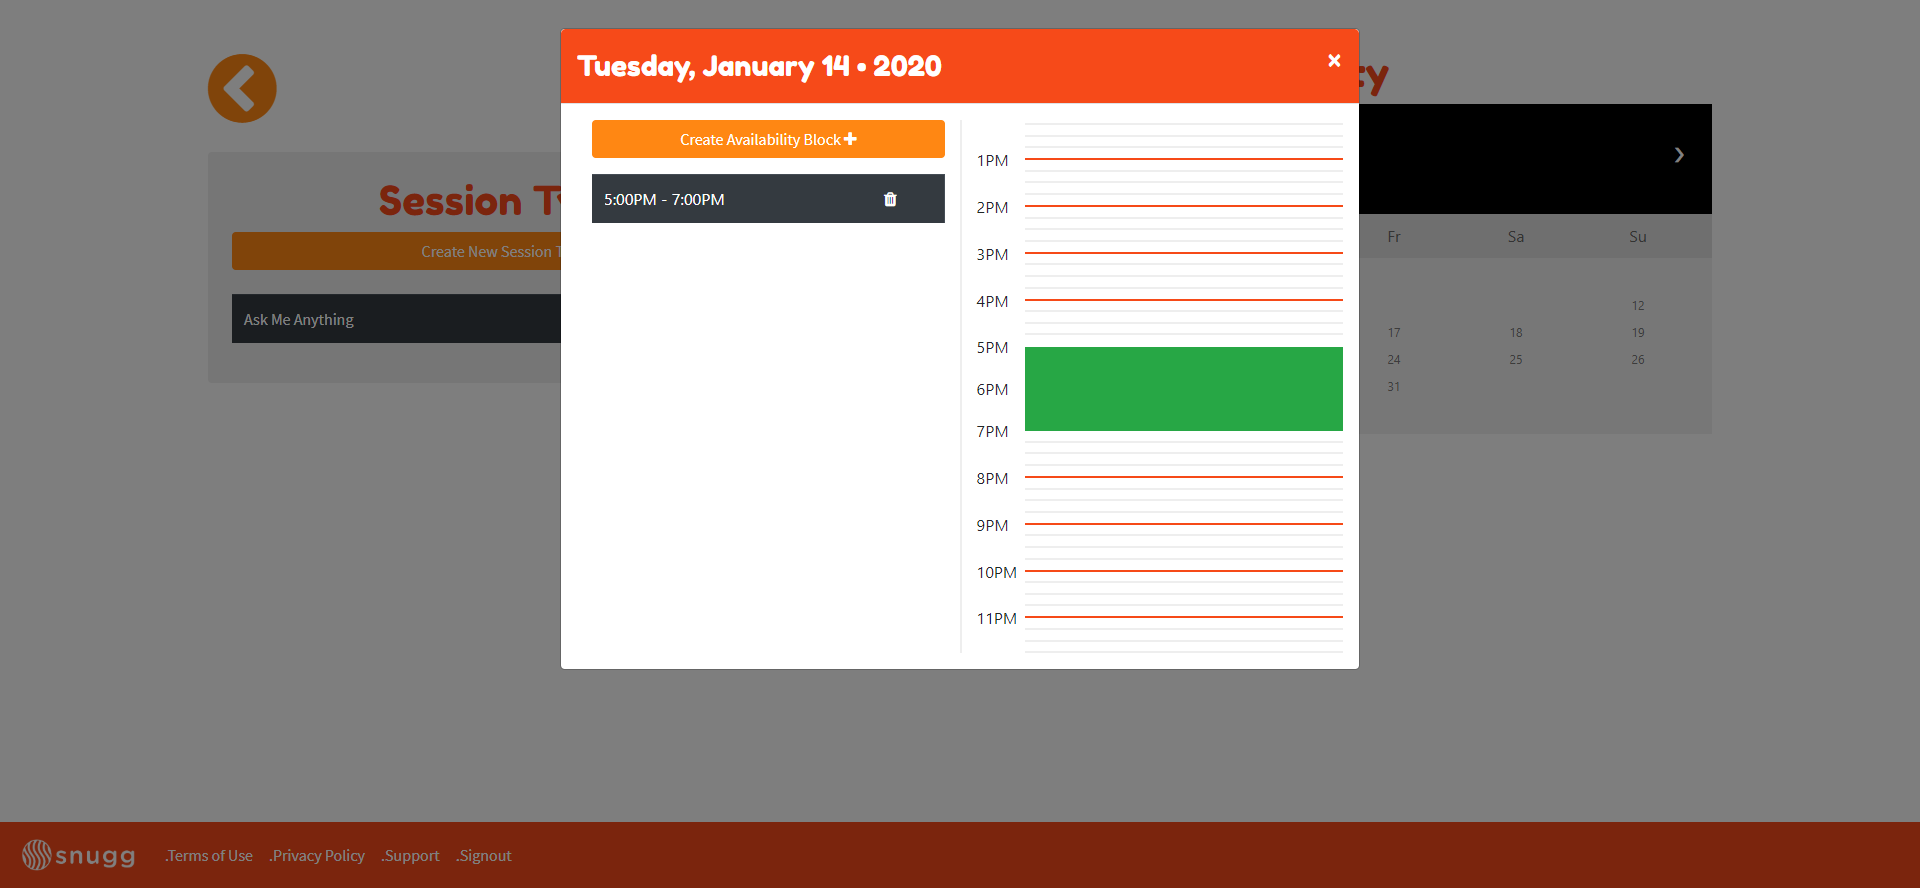
Select a date from the calendar.
Click “create availability block” and select the starting time of your availability block to when it ends.
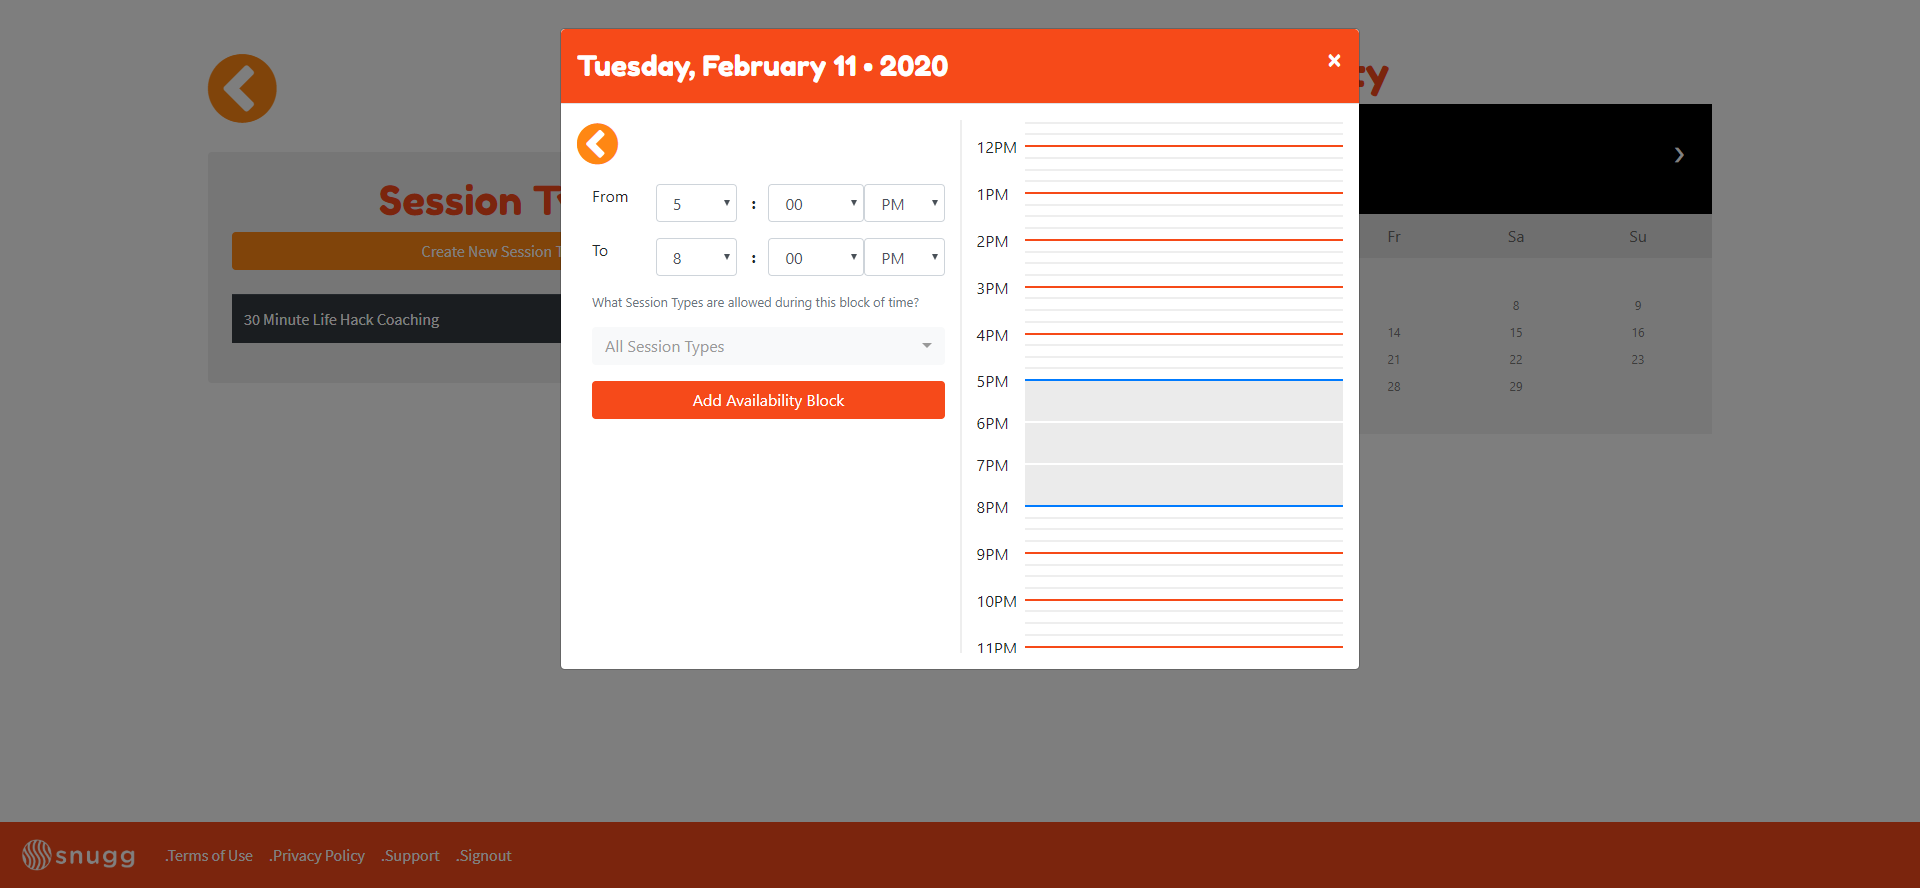
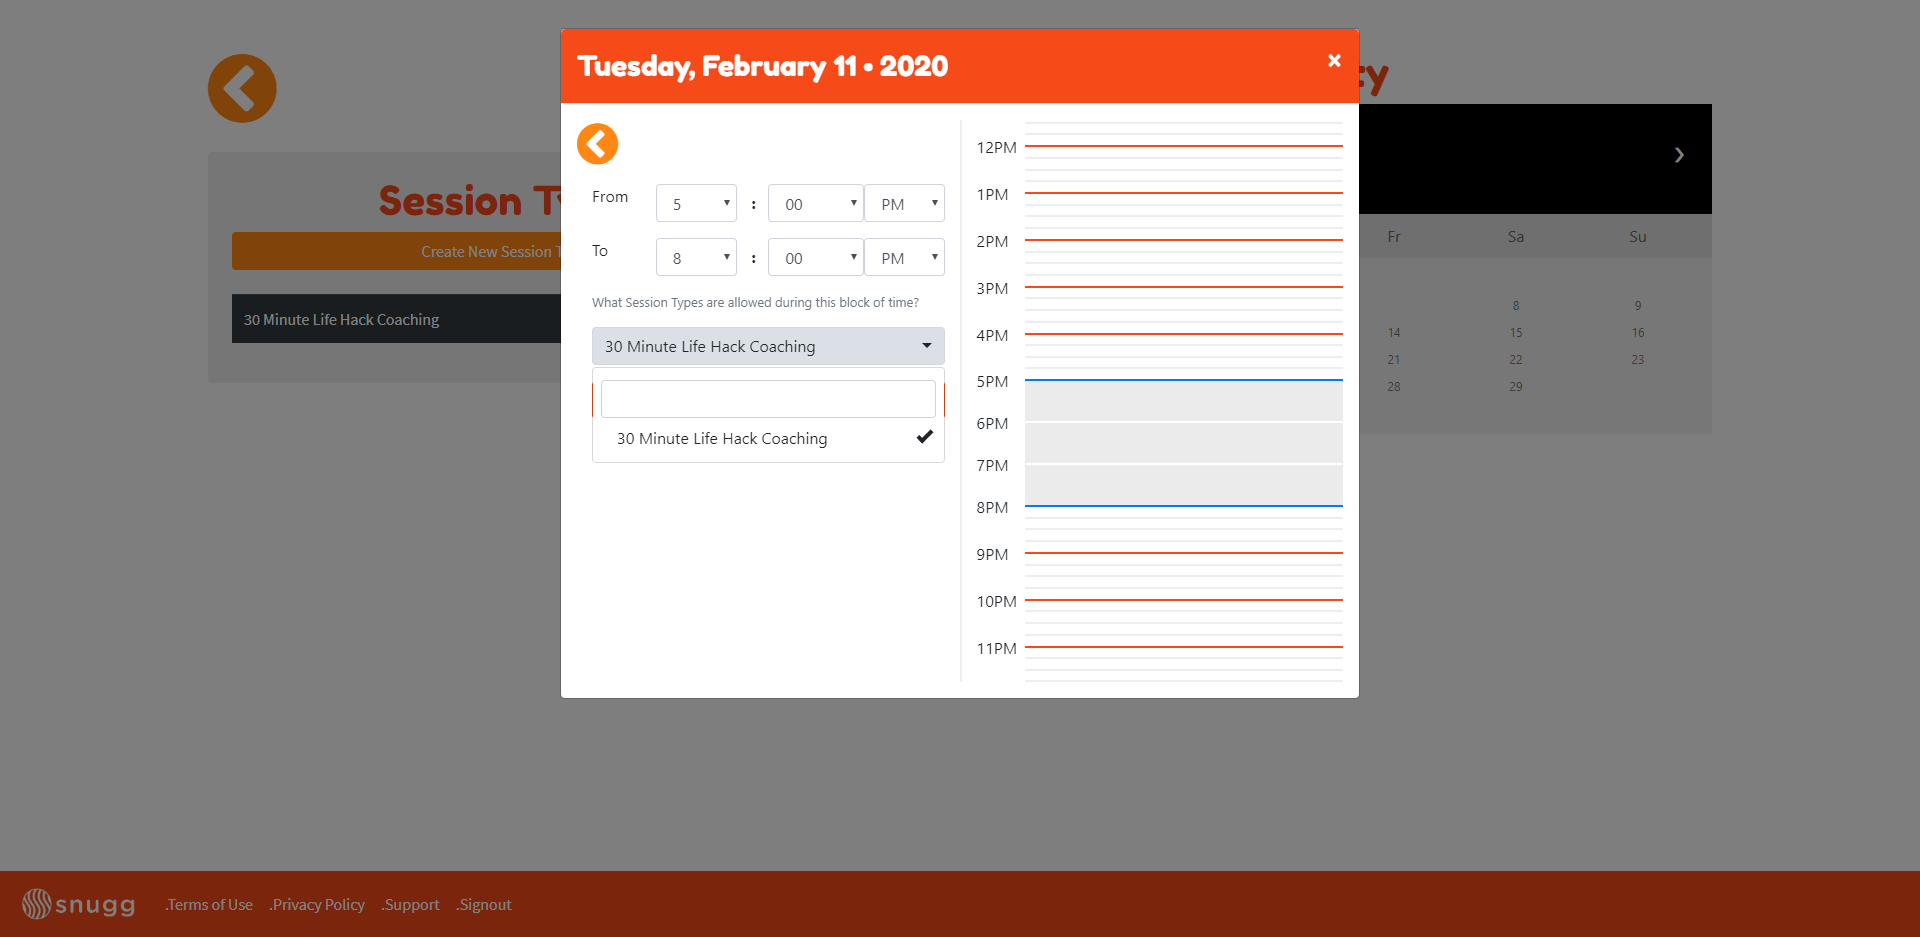
Next, click the drop down menu to select any session types you’d like to offer during this availability block. If you haven’t created any session types, click the link in the description to learn how.
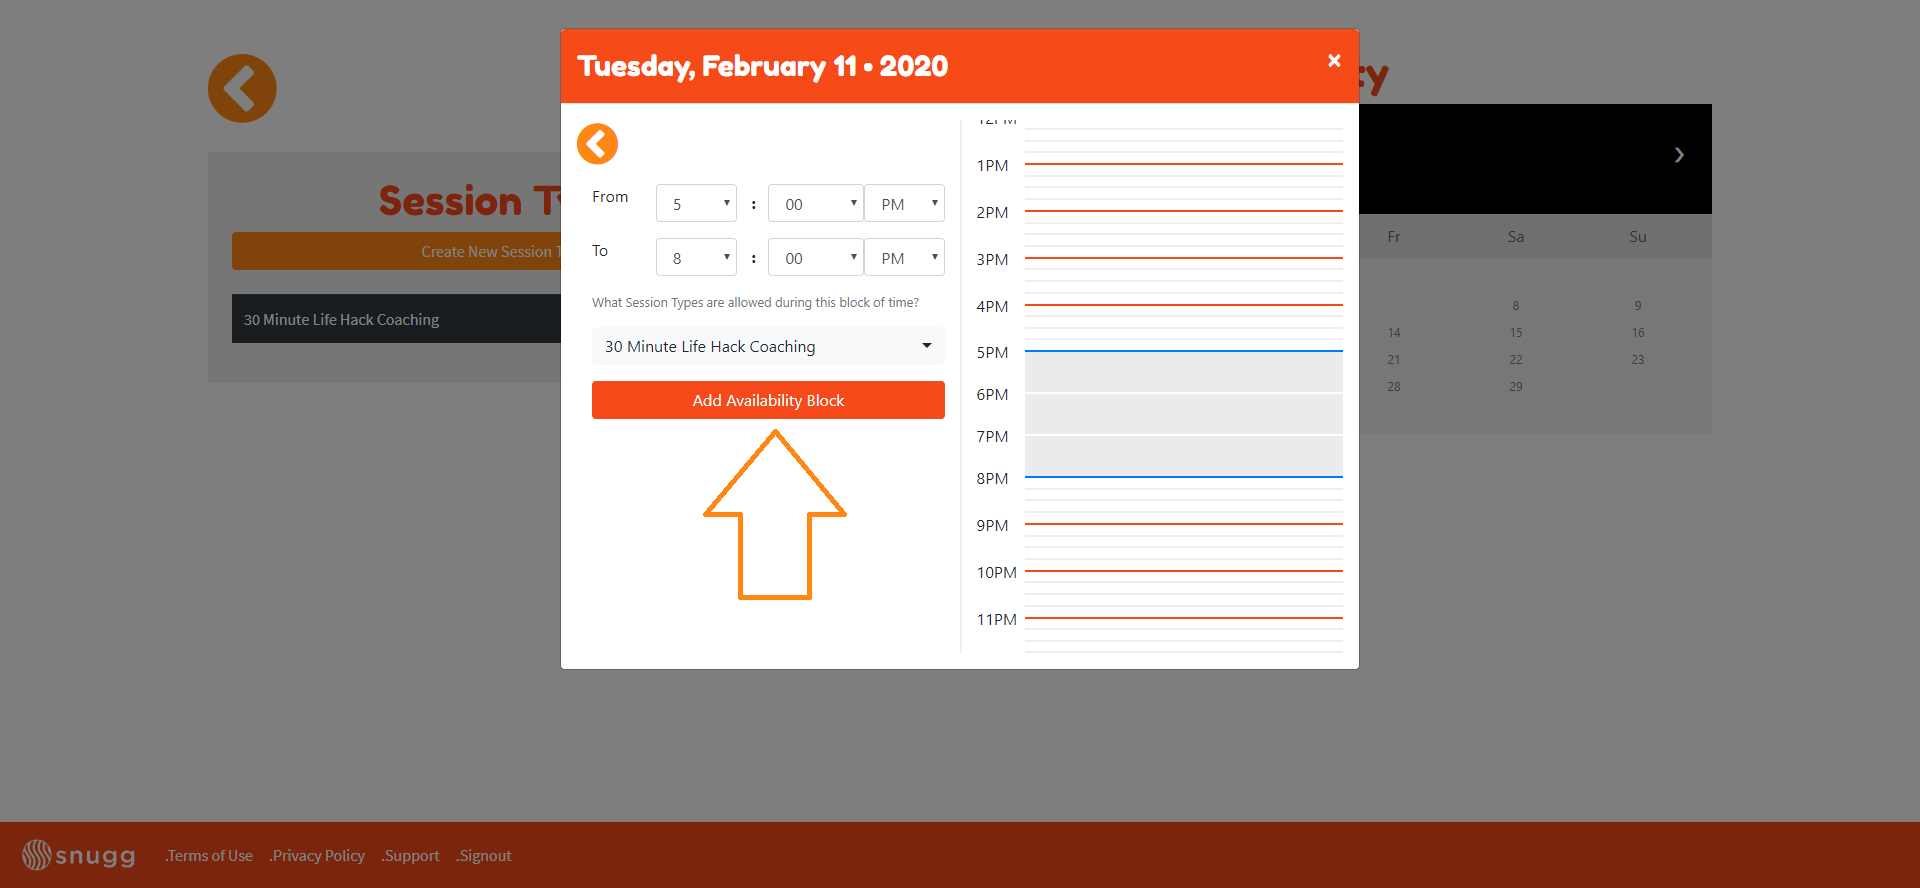
Next, click the red “Add Availability Block” button.
You’ve now created an Availability Block.

Add another availability block to this day or close the window to add another block to a different date.
You can now determine when subscribers can book video chat sessions with you.
If you’ve already created your snuggery, linked your bank account, created session types and your availability blocks you’re finished! Click your unique Snugg link at the top of the page to copy and paste it anywhere you’d like. This includes sites like Twitter, Intagram, TikTok, your website, YouTube and anywhere you’d like to place it.
You’re now ready to start taking calls! 🎉
Can I Create More Than One Availability Block At A Time?
Availability blocks are how you set your schedule and let your subscribers know when a call can be scheduled. We don’t currently support the ability to create multiple availability blocks at a time but this is something we will be working on for future releases. For now, you’ll create individual availability blocks for each day.
How Do I Get Paid?
When you first create your Snugg account, you’ll be walked through linking your bank account to Stripe. After you’ve successfully linked your bank account, setup your Snuggery, sessions types and availability you’ll be able to start taking calls. Once you complete a call, the money charged to your subscriber is distributed into your Snugg account which can be deposited into your bank account.
Note: Money can take up to 2-3 business days after the call to become available and another 2-3 business days to be deposited into your account. You keep 90% of whatever you charge with 3% going to Stripe/credit card services and 7% going to Snugg.
To Get Paid Follow These Steps
After your call is over, navigate to the Snugg dashboard and click payments.
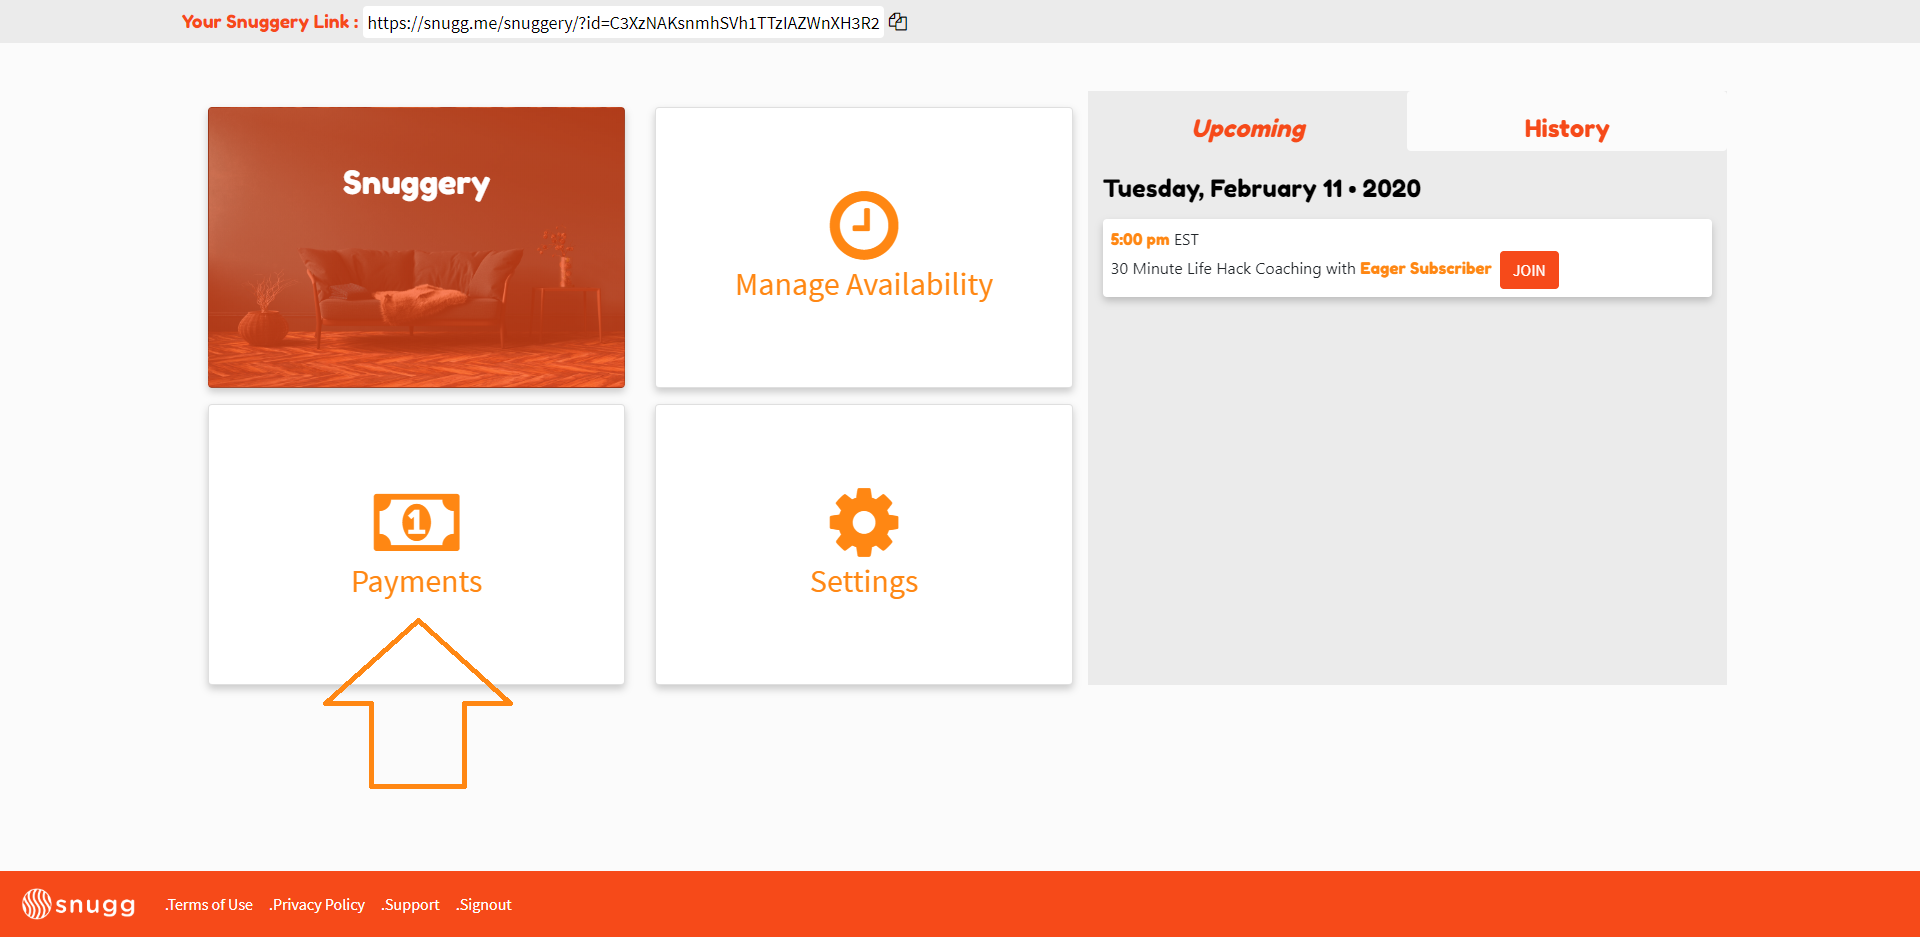
You’ll have both a pending amount and an available amount.
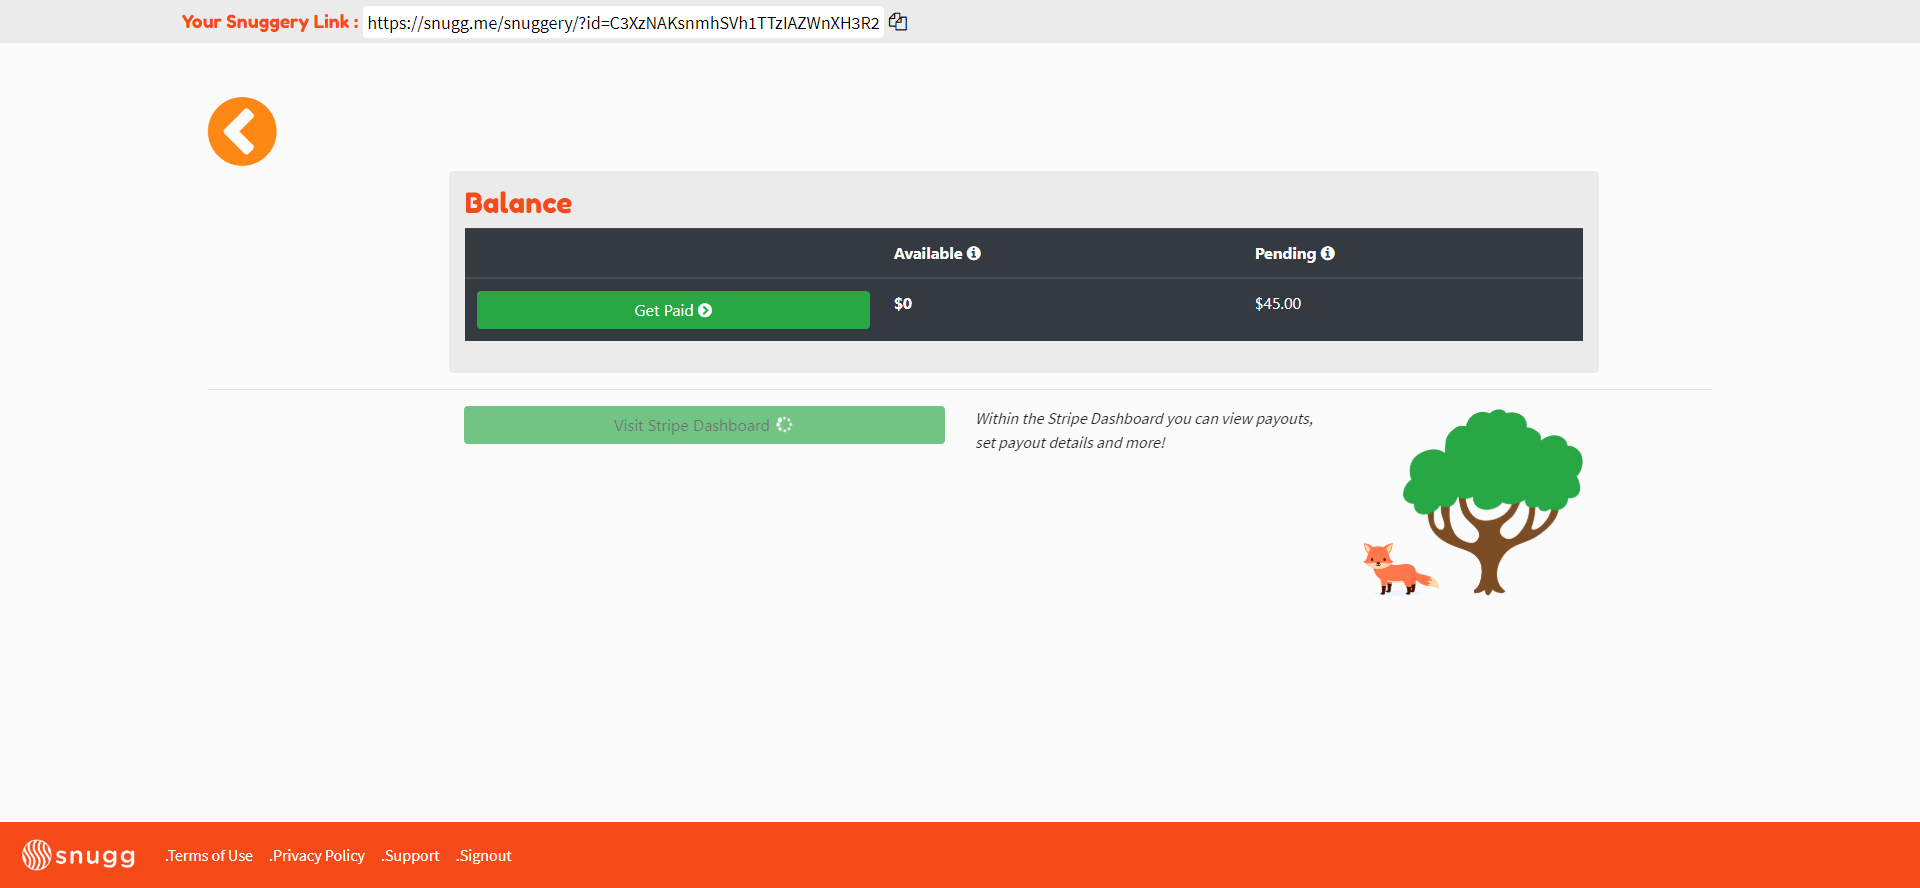
Note: It can take up to 3 days after a call ends for the pending amount to move to available. Click “get paid” and select any sessions you’d like to be paid for.
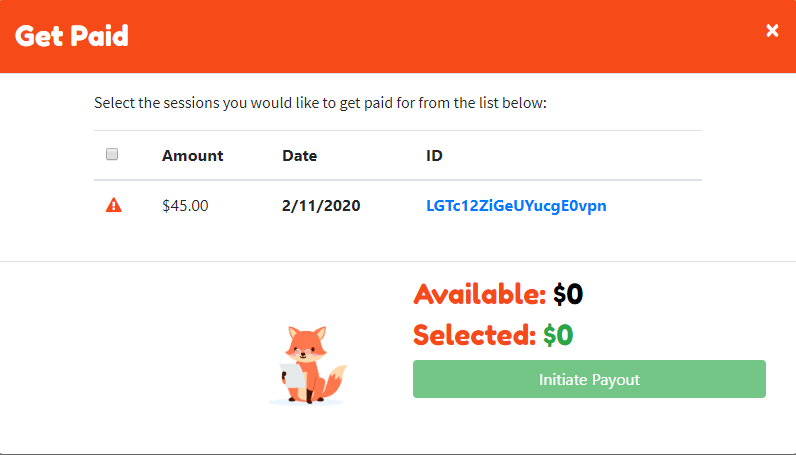
Note: Any sessions that have an “urgent” icon next to them instead of an open checkbox are sessions that need to be closed. Click the blue ID code to close out the session.
After you’ve selected all the sessions you’d like to be paid out on click Initiate Payout.
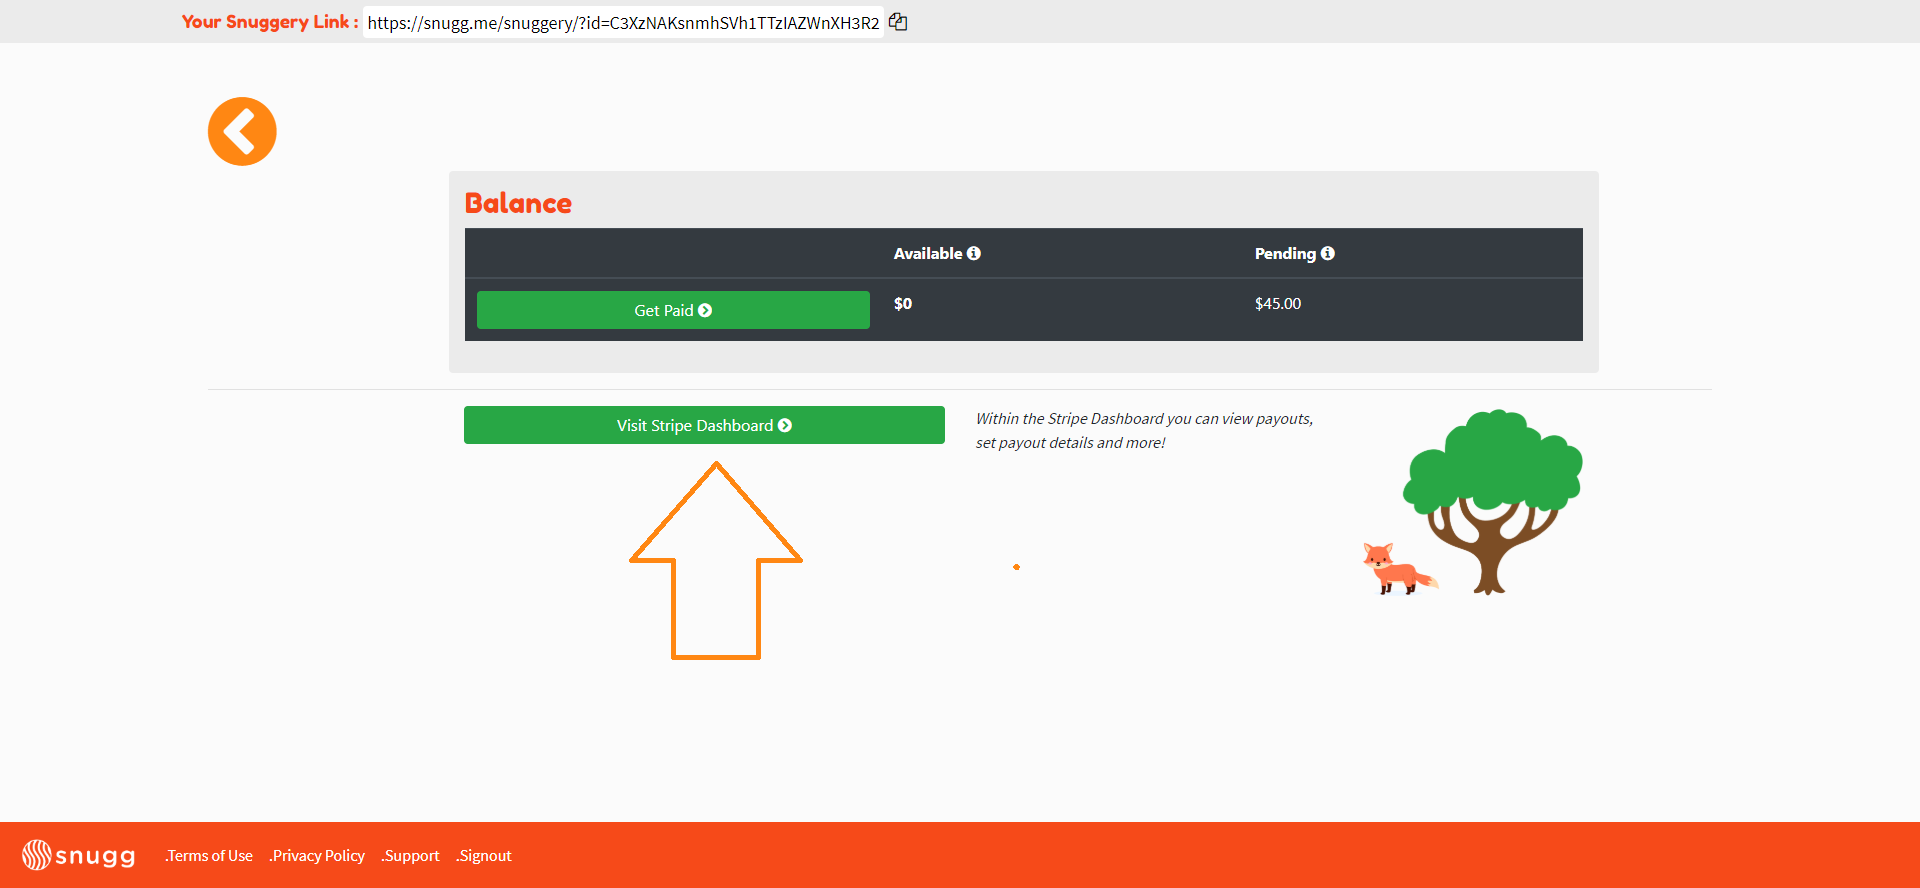
Next, click to “Visit Your Stripe Dashboard.”
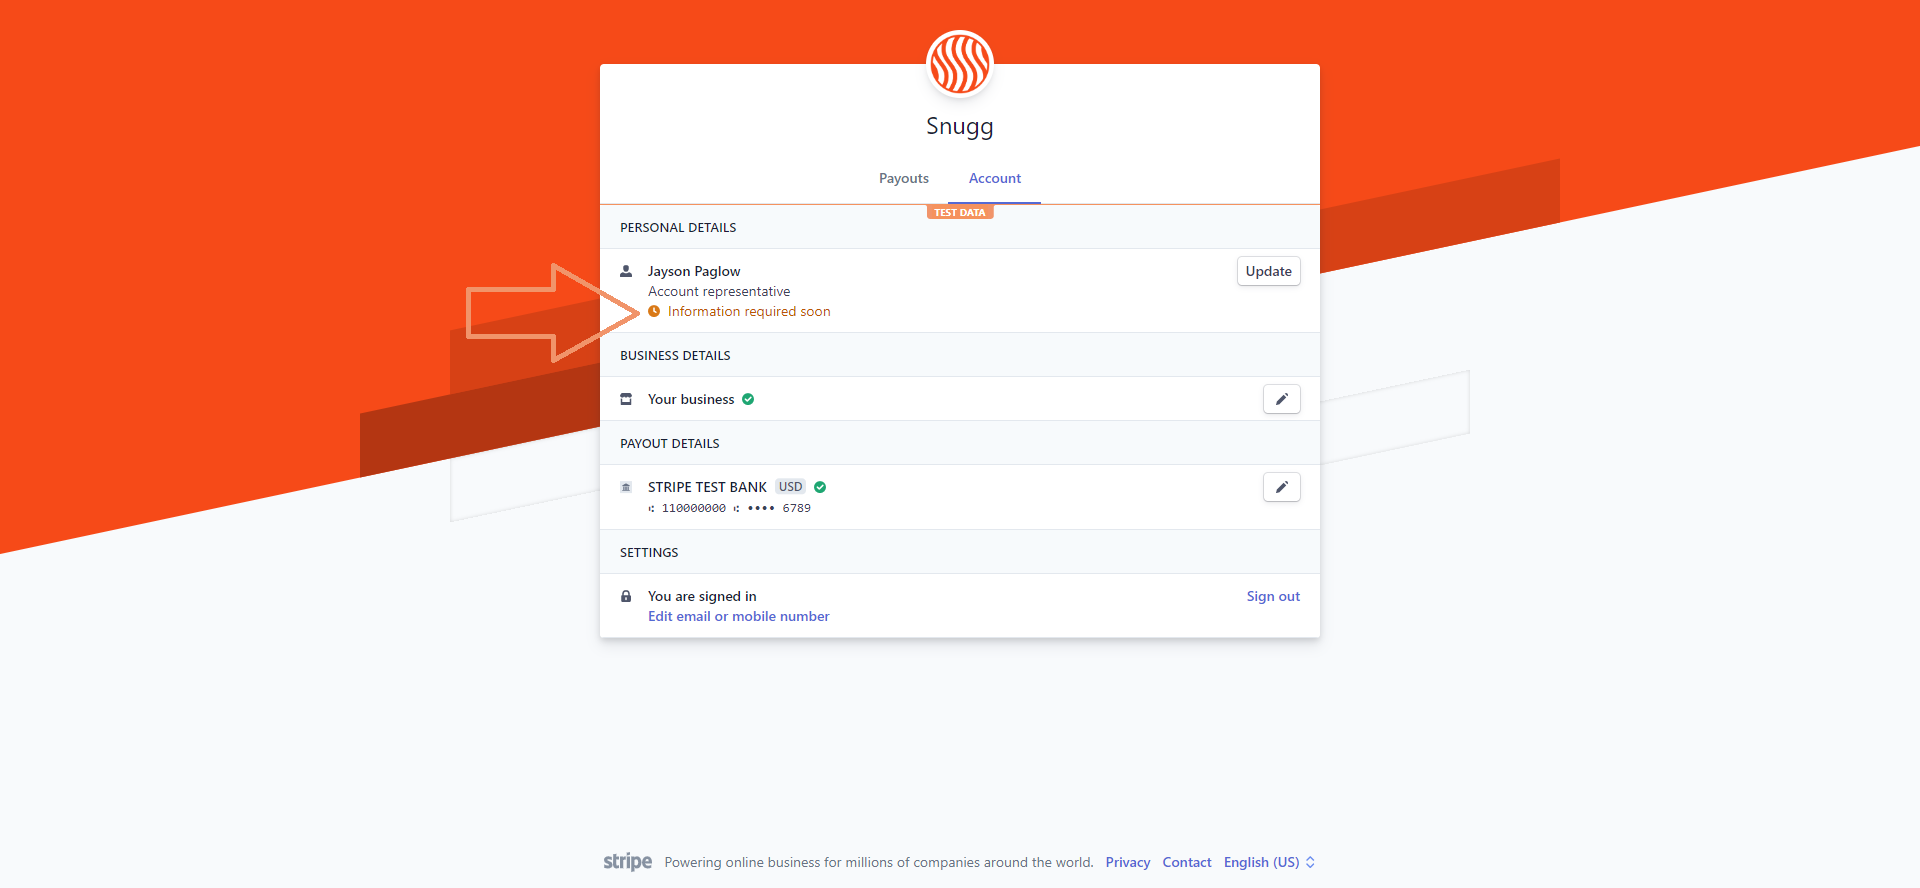
Here you can see your history of payouts, stripe balance and change your banking/personal details
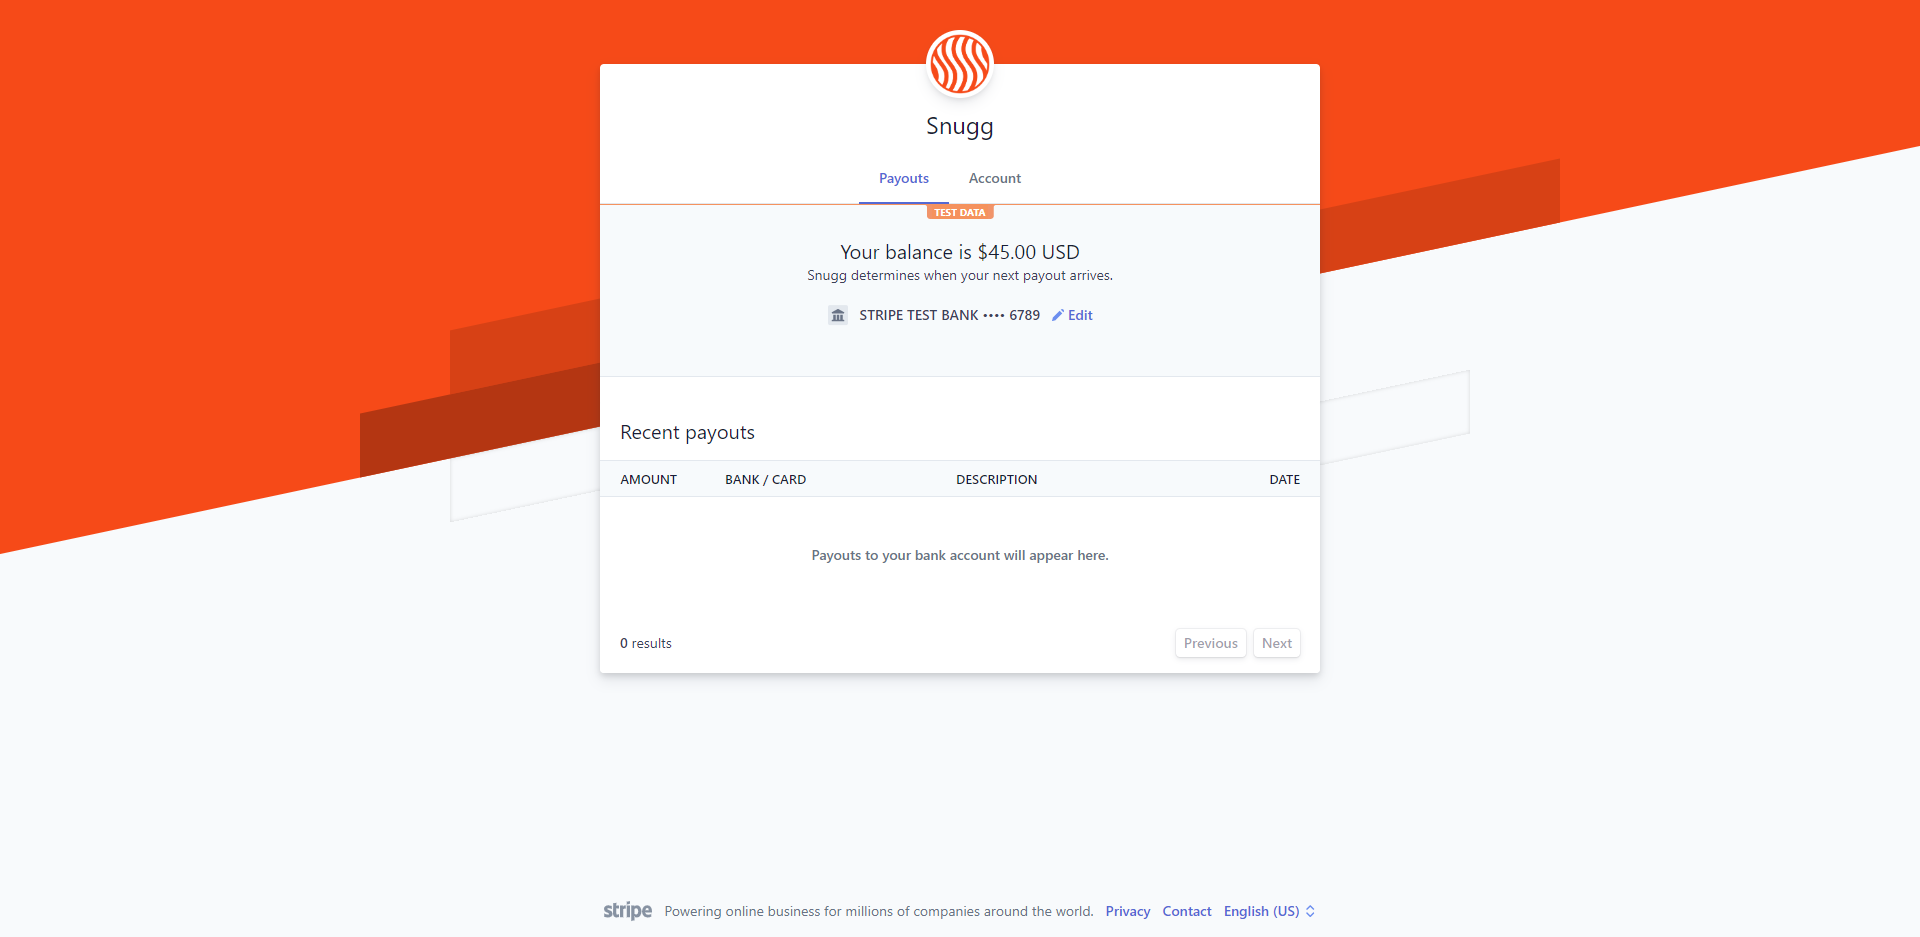
On the Account tab you’ll likely see an alert that says “Information Required Soon.” If you see this, click update and make sure your date of birth and last 4 of your social security number are entered on the next page.
That’s it! You’re fully setup to withdrawal payments after completing calls! If you have any questions concerning your account or setting up payment please contact support.
If you’d like further resources to help get started with Snugg be sure to check out our Knowledge Base along with these articles: